You want to avoid malfunctioning, leaking or non-functioning machines at all times. Problems with the oil seal or incorrect fitting of this part can have major consequences. With the tips below, you can easily perform the assembly yourself and solve your problems. Read on quickly!
Clean and positioning
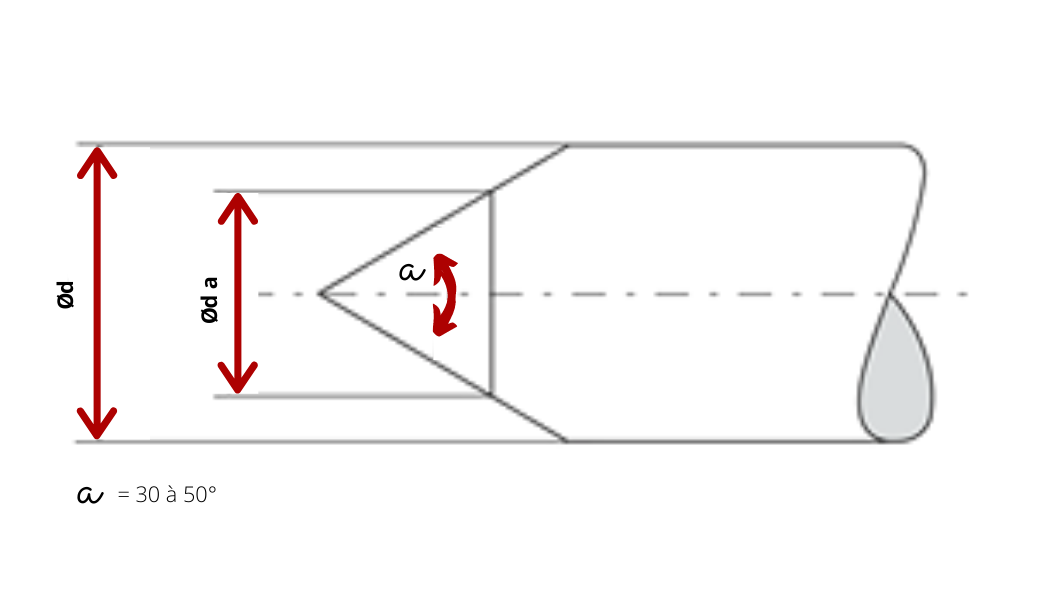
The most important thing? Keep the cylinders, bore and shaft clean. Dirt between the sealing lip and shaft will cause a leak. In addition, the inner diameter of the oil seal must be stretched during assembly. Here it is important that the shaft has a run-up edge at an angle of 30° to 50°. The bore must also have a minimum chamfer of 30° on the run-up side. You can see that in this illustration:
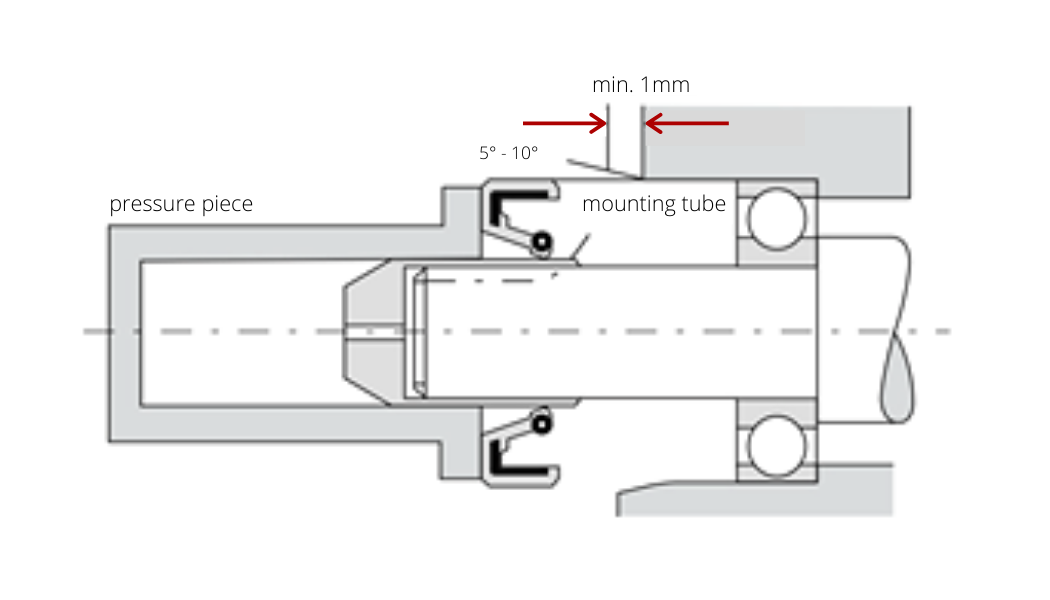
Take care not to damage the sealing lip
To prevent damage to the seal, wrap the places where the oil seal slides over the shaft - e.g. thread, keyway or other irregularities - with tape or a protective mounting sleeve made of plastic or metal. In order to influence good sliding over the shaft, lubricate the oil seal lip well with oil or grease:
What else should you bear in mind when fitting an oil seal?
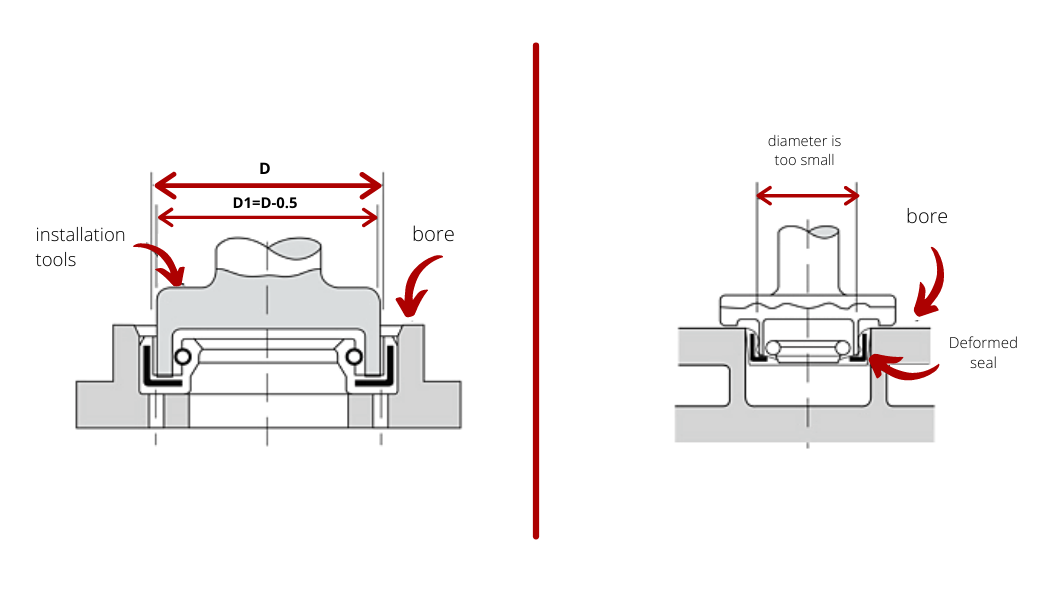
Avoid using installation tools with a diameter that is too small.
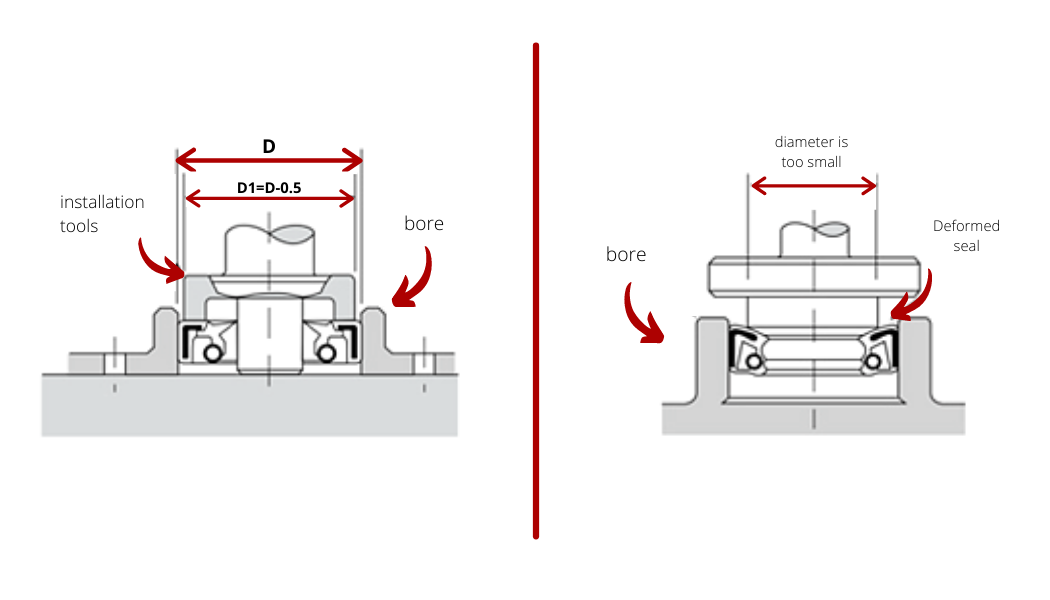
Ensure that the correct installation tools are used during assembly.

Do not use excessive force when inserting the oil seal into the bore. Use a suitable installation tool and carefully press the oil seal into the bore.
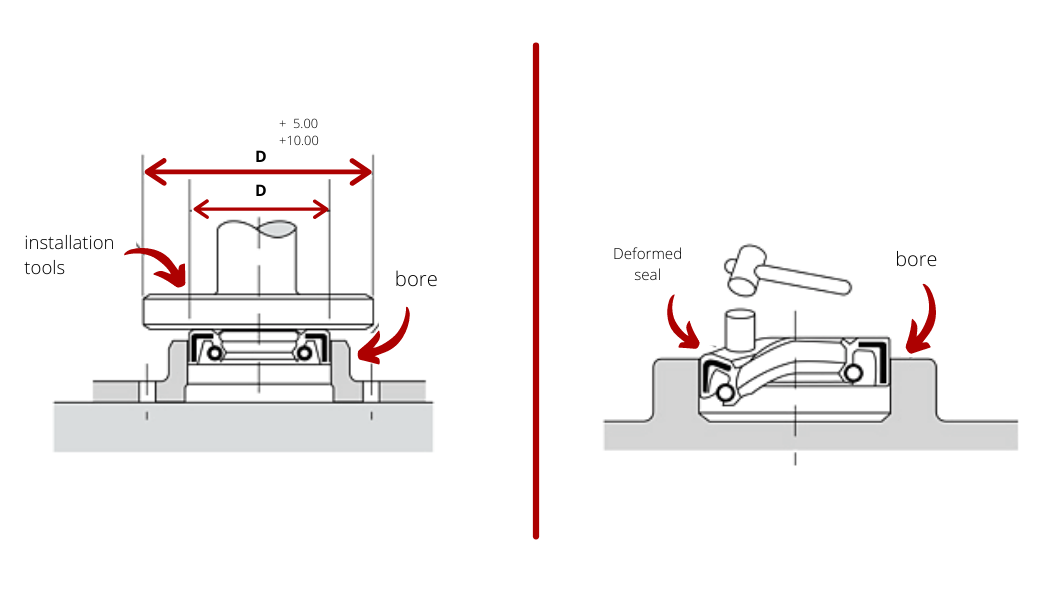
Apply lubricant to the shaft to allow the seal to run in. Also grease the bore to help assembly.
How do I find the problem and how do I solve it?
- The oil seal is mounted crooked and therefore distorted
Reason: Too small an internal diameter of the bore.
Solution: Check the size of the hole.
- The circumference of the oil seal is damaged
Reason: Incorrect completion of the bore or incorrect assembly.
Solution: Check the presence of the overrunning edge and the presence of the bore.
Reason: Dirt on the inside of the bore or the circumference of the oil seal.
Solution: Make sure all parts are cleaned before assembly.
Reason: Not enough lubrication.
Solution: Apply correct and sufficient lubrication.
- Sealing lip folded over
Reason: Medium has too high a pressure.
Solution: When purchasing, consider a type of oil seal that is suitable for higher pressure.
- Scratched sealing lip
Reason: The roughness of the shaft is incorrect.
Solution: Check the roughness of the shaft.
Reason: Scratches due to use of incorrect tools or incorrect assembly.
Solution: Mount correctly and lubricate the seal lip and shaft before mounting.
- Oil seal moves in axial direction along the shaft
Reason: Inner diameter of the bore is larger than the outer diameter of the oil seal. The oil seal is displaced axially due to the overpressure it creates.
Solution: Check the size of the oil seal and replace it.
- Oil seal rotates with shaft
Reason: Inner diameter is larger than the outer diameter of the oil seal.
Solution: Check the size of the oil seal and replace it.
- Deformed oil seal housing
Reason: Use of wrong tools during assembly.
Solution: Use the correct tools.
- Swollen sealing lip
Reason: Rubber compound is incorrect.
Solution: Choosing the right material.
Reason: Incorrect hardness of the shaft.
Solution: Check the hardness of the shaft.
- Sealing lip wear
Reason: Limited lubricant supply to sealing lip due to construction.
Solution: Change the construction so that sufficient lubricant reaches the lip seal.
- The flexible part contains cracks (membrane)
Reason: Excessive pressure of medium / Unexpected pressure surges on the diaphragm.
Solution: Consider a type of oil seal suitable for overpressure.
Reason: Incorrect angle of the overrun cone of the shaft.
Solution: Fit an overflow cone to the shaft or use a mounting bushing.
- Cracks, hardened and worn sealing lip
Reason: Pressure and temperature of the shaft are too high or too high pressure.
Solution: Use the correct rubber compound and the correct type of oil seal.
- Coil spring goes out of the groove
Reason: Mounting is incorrect.
Solution: Carefully fit the oil seal.
Reason: Shallow groove of the spring.
Solution: Use a spring with a smaller diameter or a different design.
Do you have any questions?
Please contact a Kramp product specialist or contact us at knowledgecenter@kramp.com. Would you like to see all of the oil seals and lubricants that we sell? Then take a look in our webshop.