Agricultural machinery and equipment are designed and produced all over the world. As a result, hydraulic systems have a wide variety of thread types. This is reflected in various components, such as fittings, filters, valves, nozzles, connectors, quick couplings, air cleaners and regulators. How do you identify the thread? Read it in this article.
Seals are often easy to distinguish by their appearance, but different threads look very similar at first glance. Identifying the right thread is crucial to selecting the right parts to carry out your repairs or maintenance. Selecting the wrong type can lead to thread damage during installation, which affects the reliability of the pressure and sealing of the fitting.
These are some of the different types available:
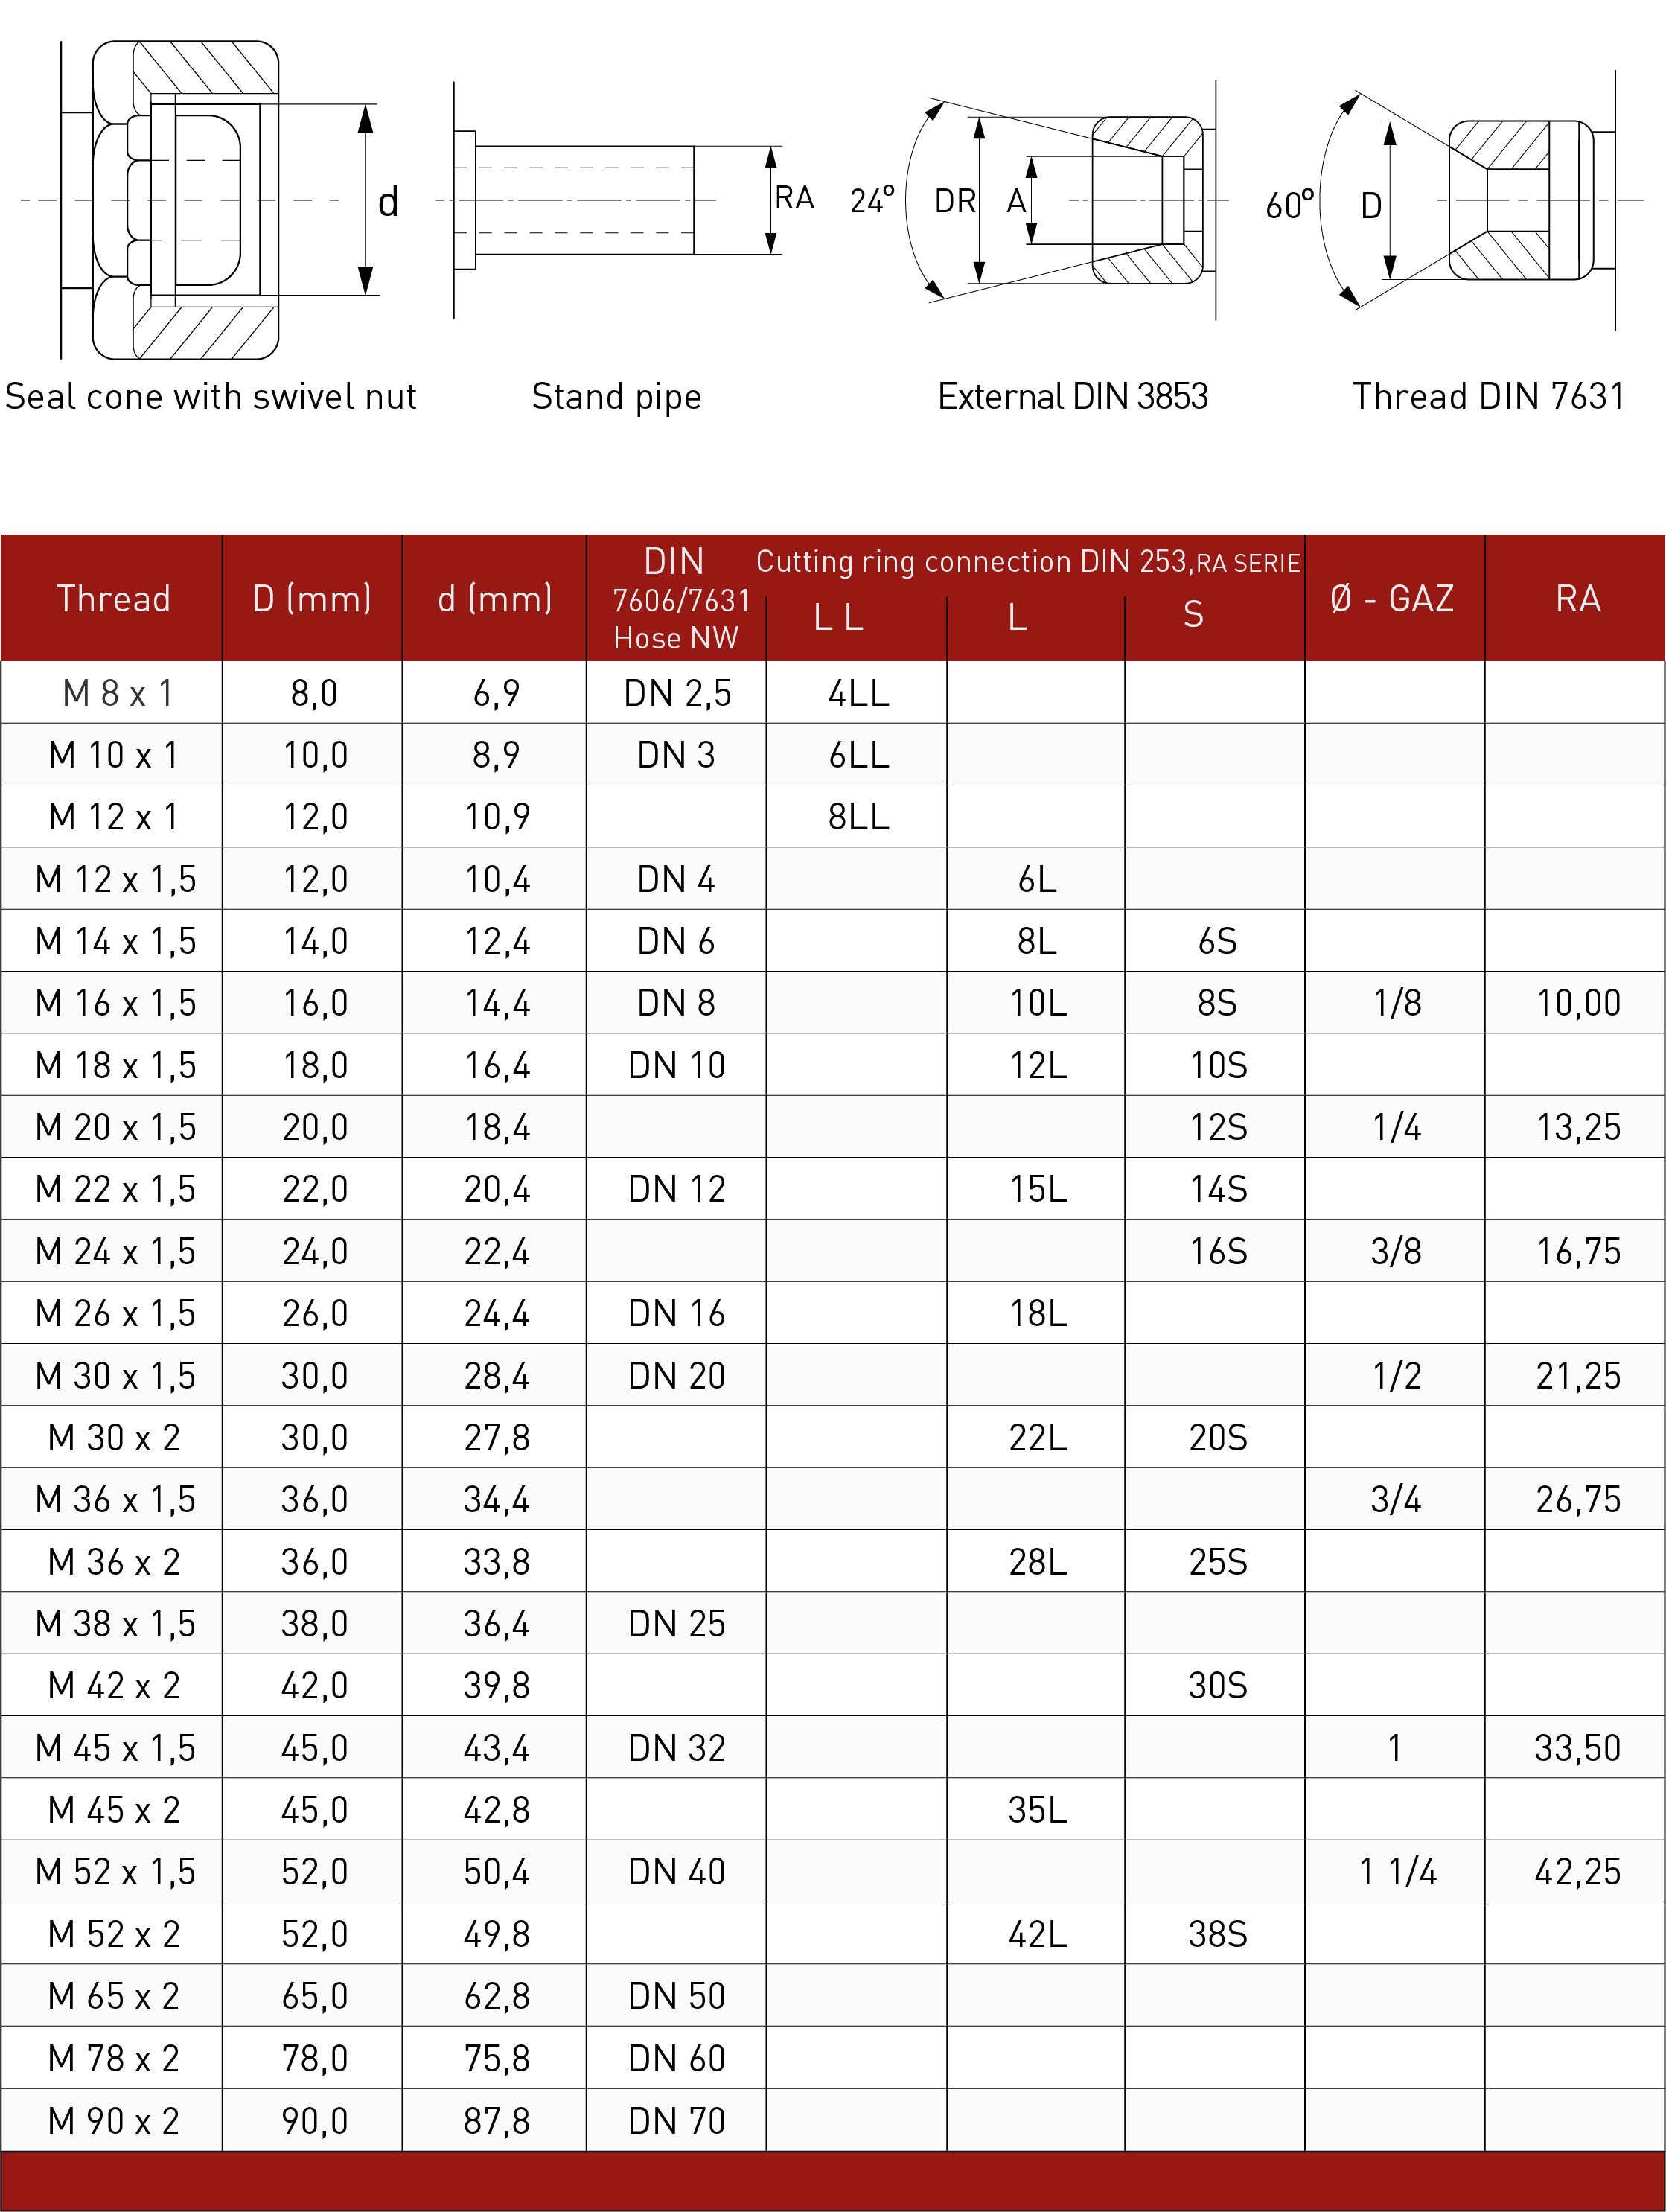
- Metric tapered;
- Metric parallel;
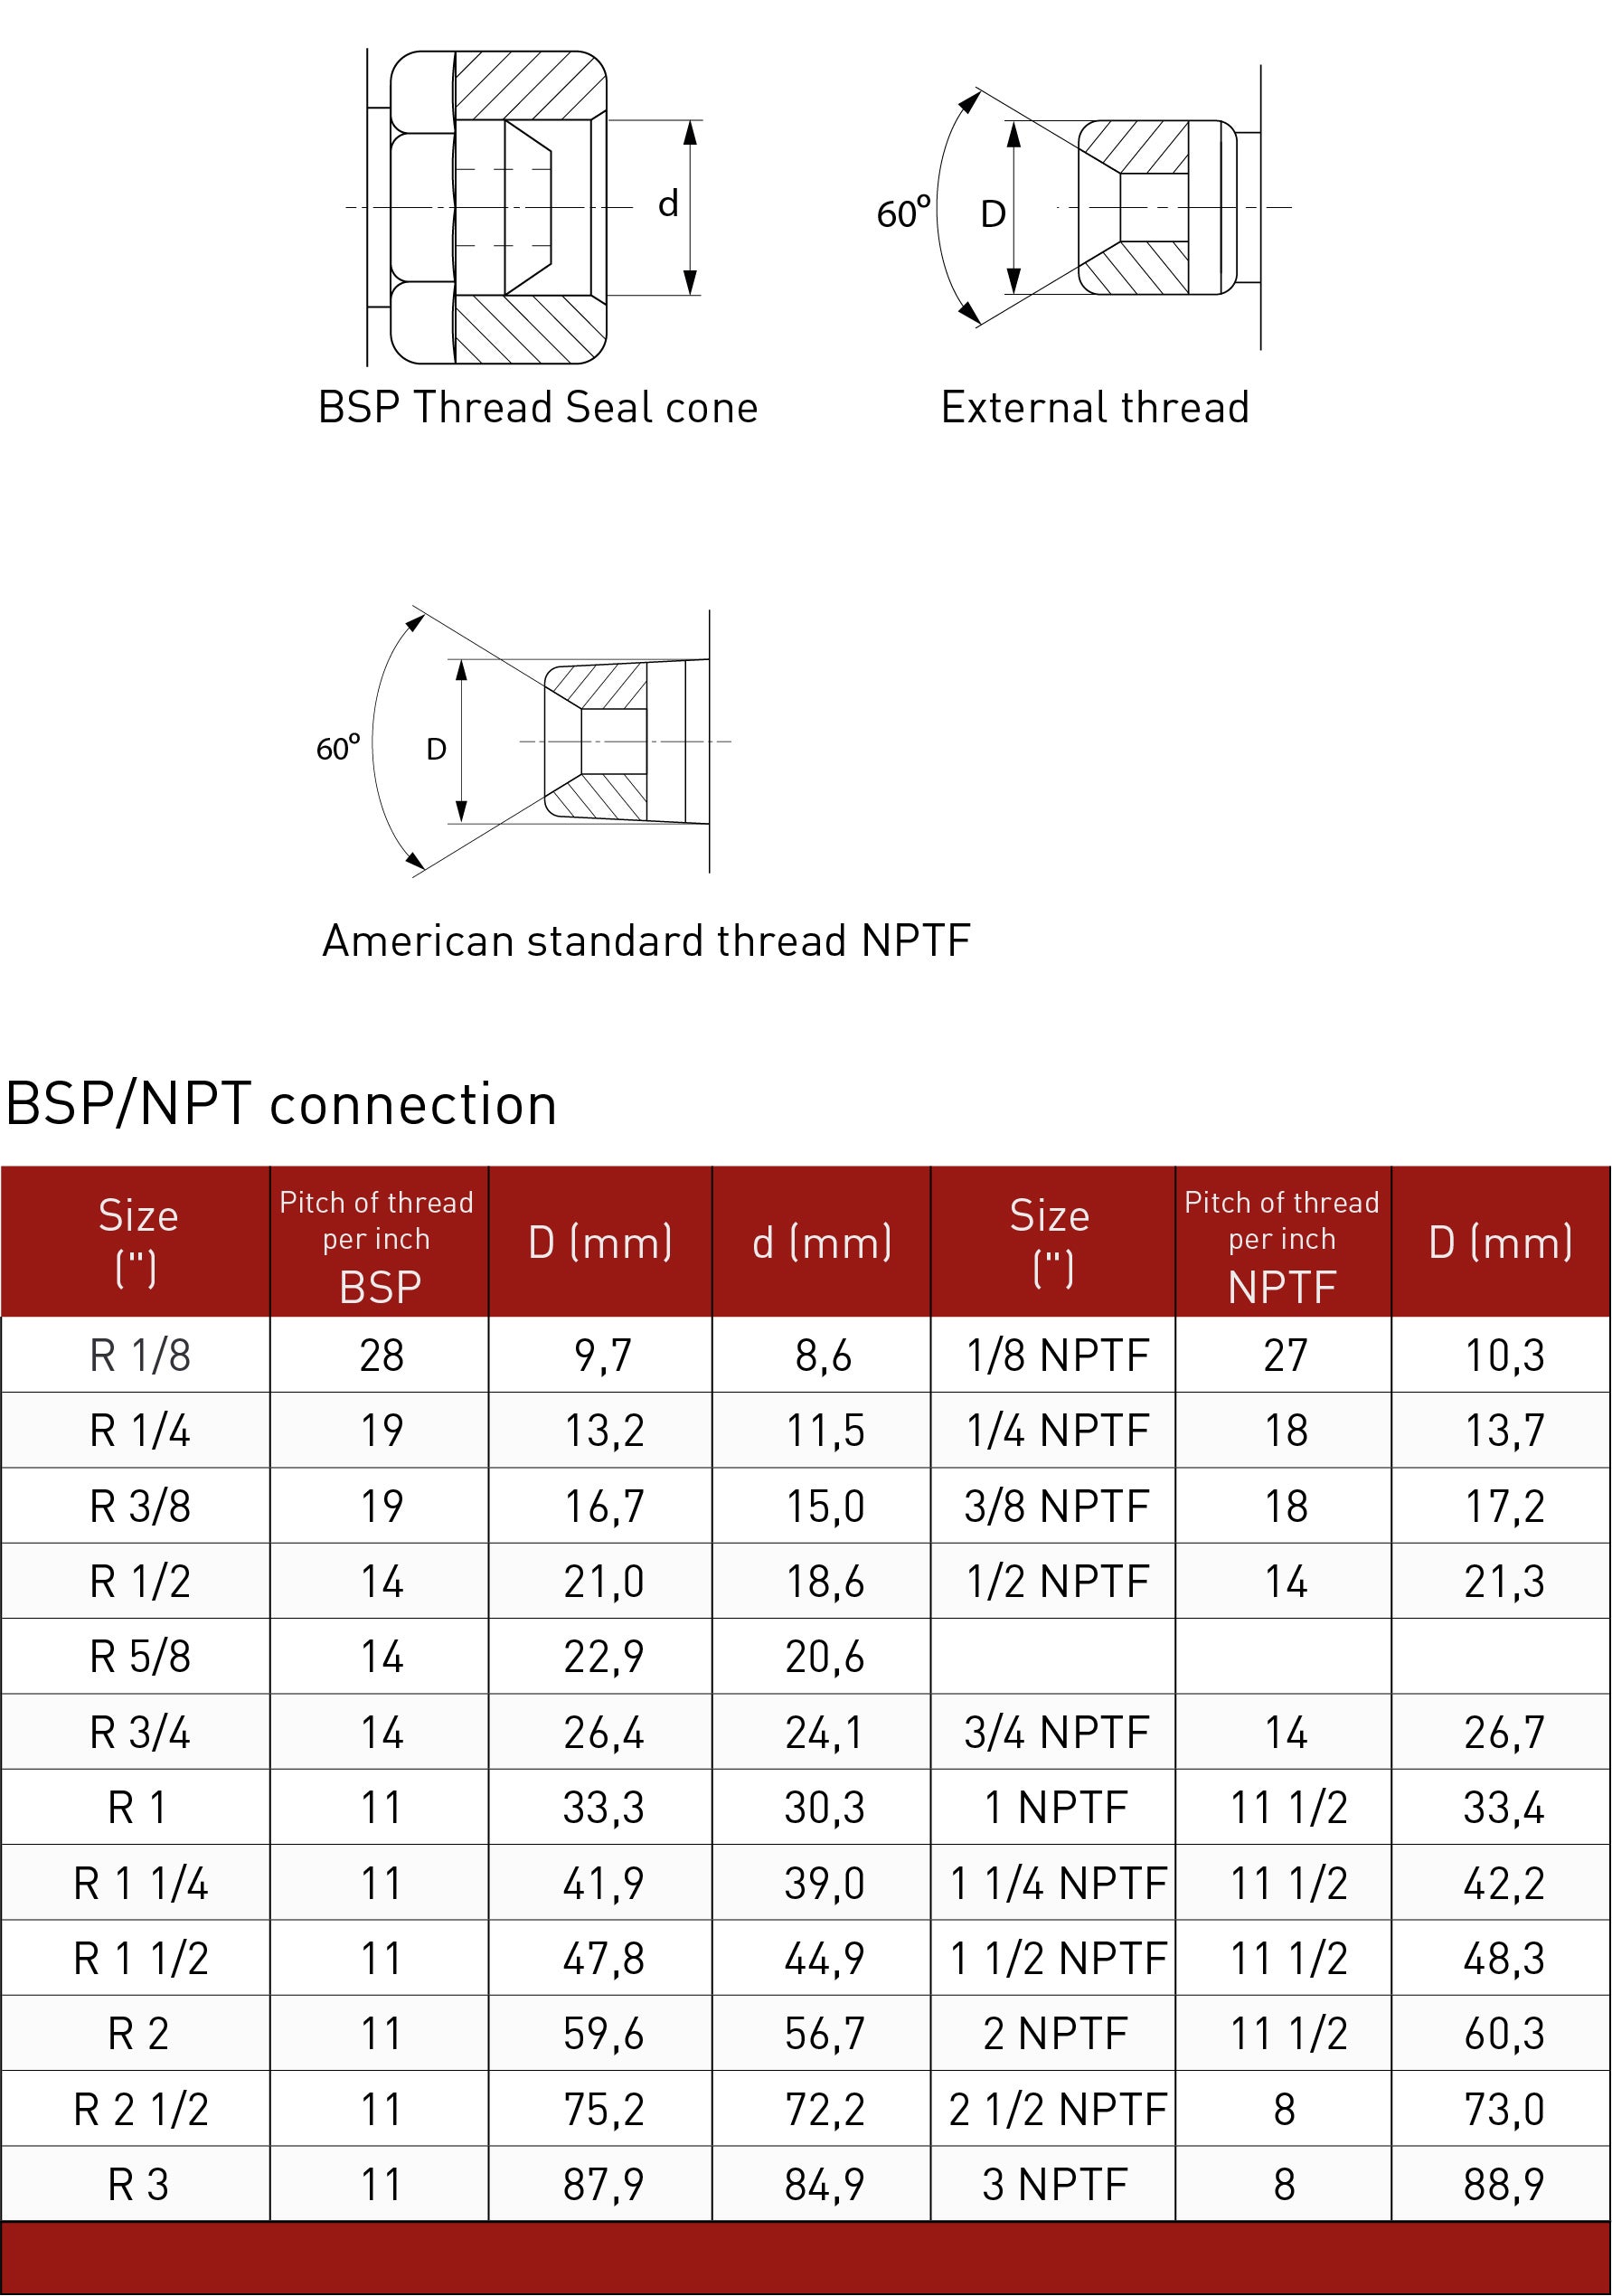
- British Standard Pipe (BSPP: parallel or BSPT: tapered);
- DKR-H/AGR-H;
- National Pipe Taper (NPT): AGN-H;
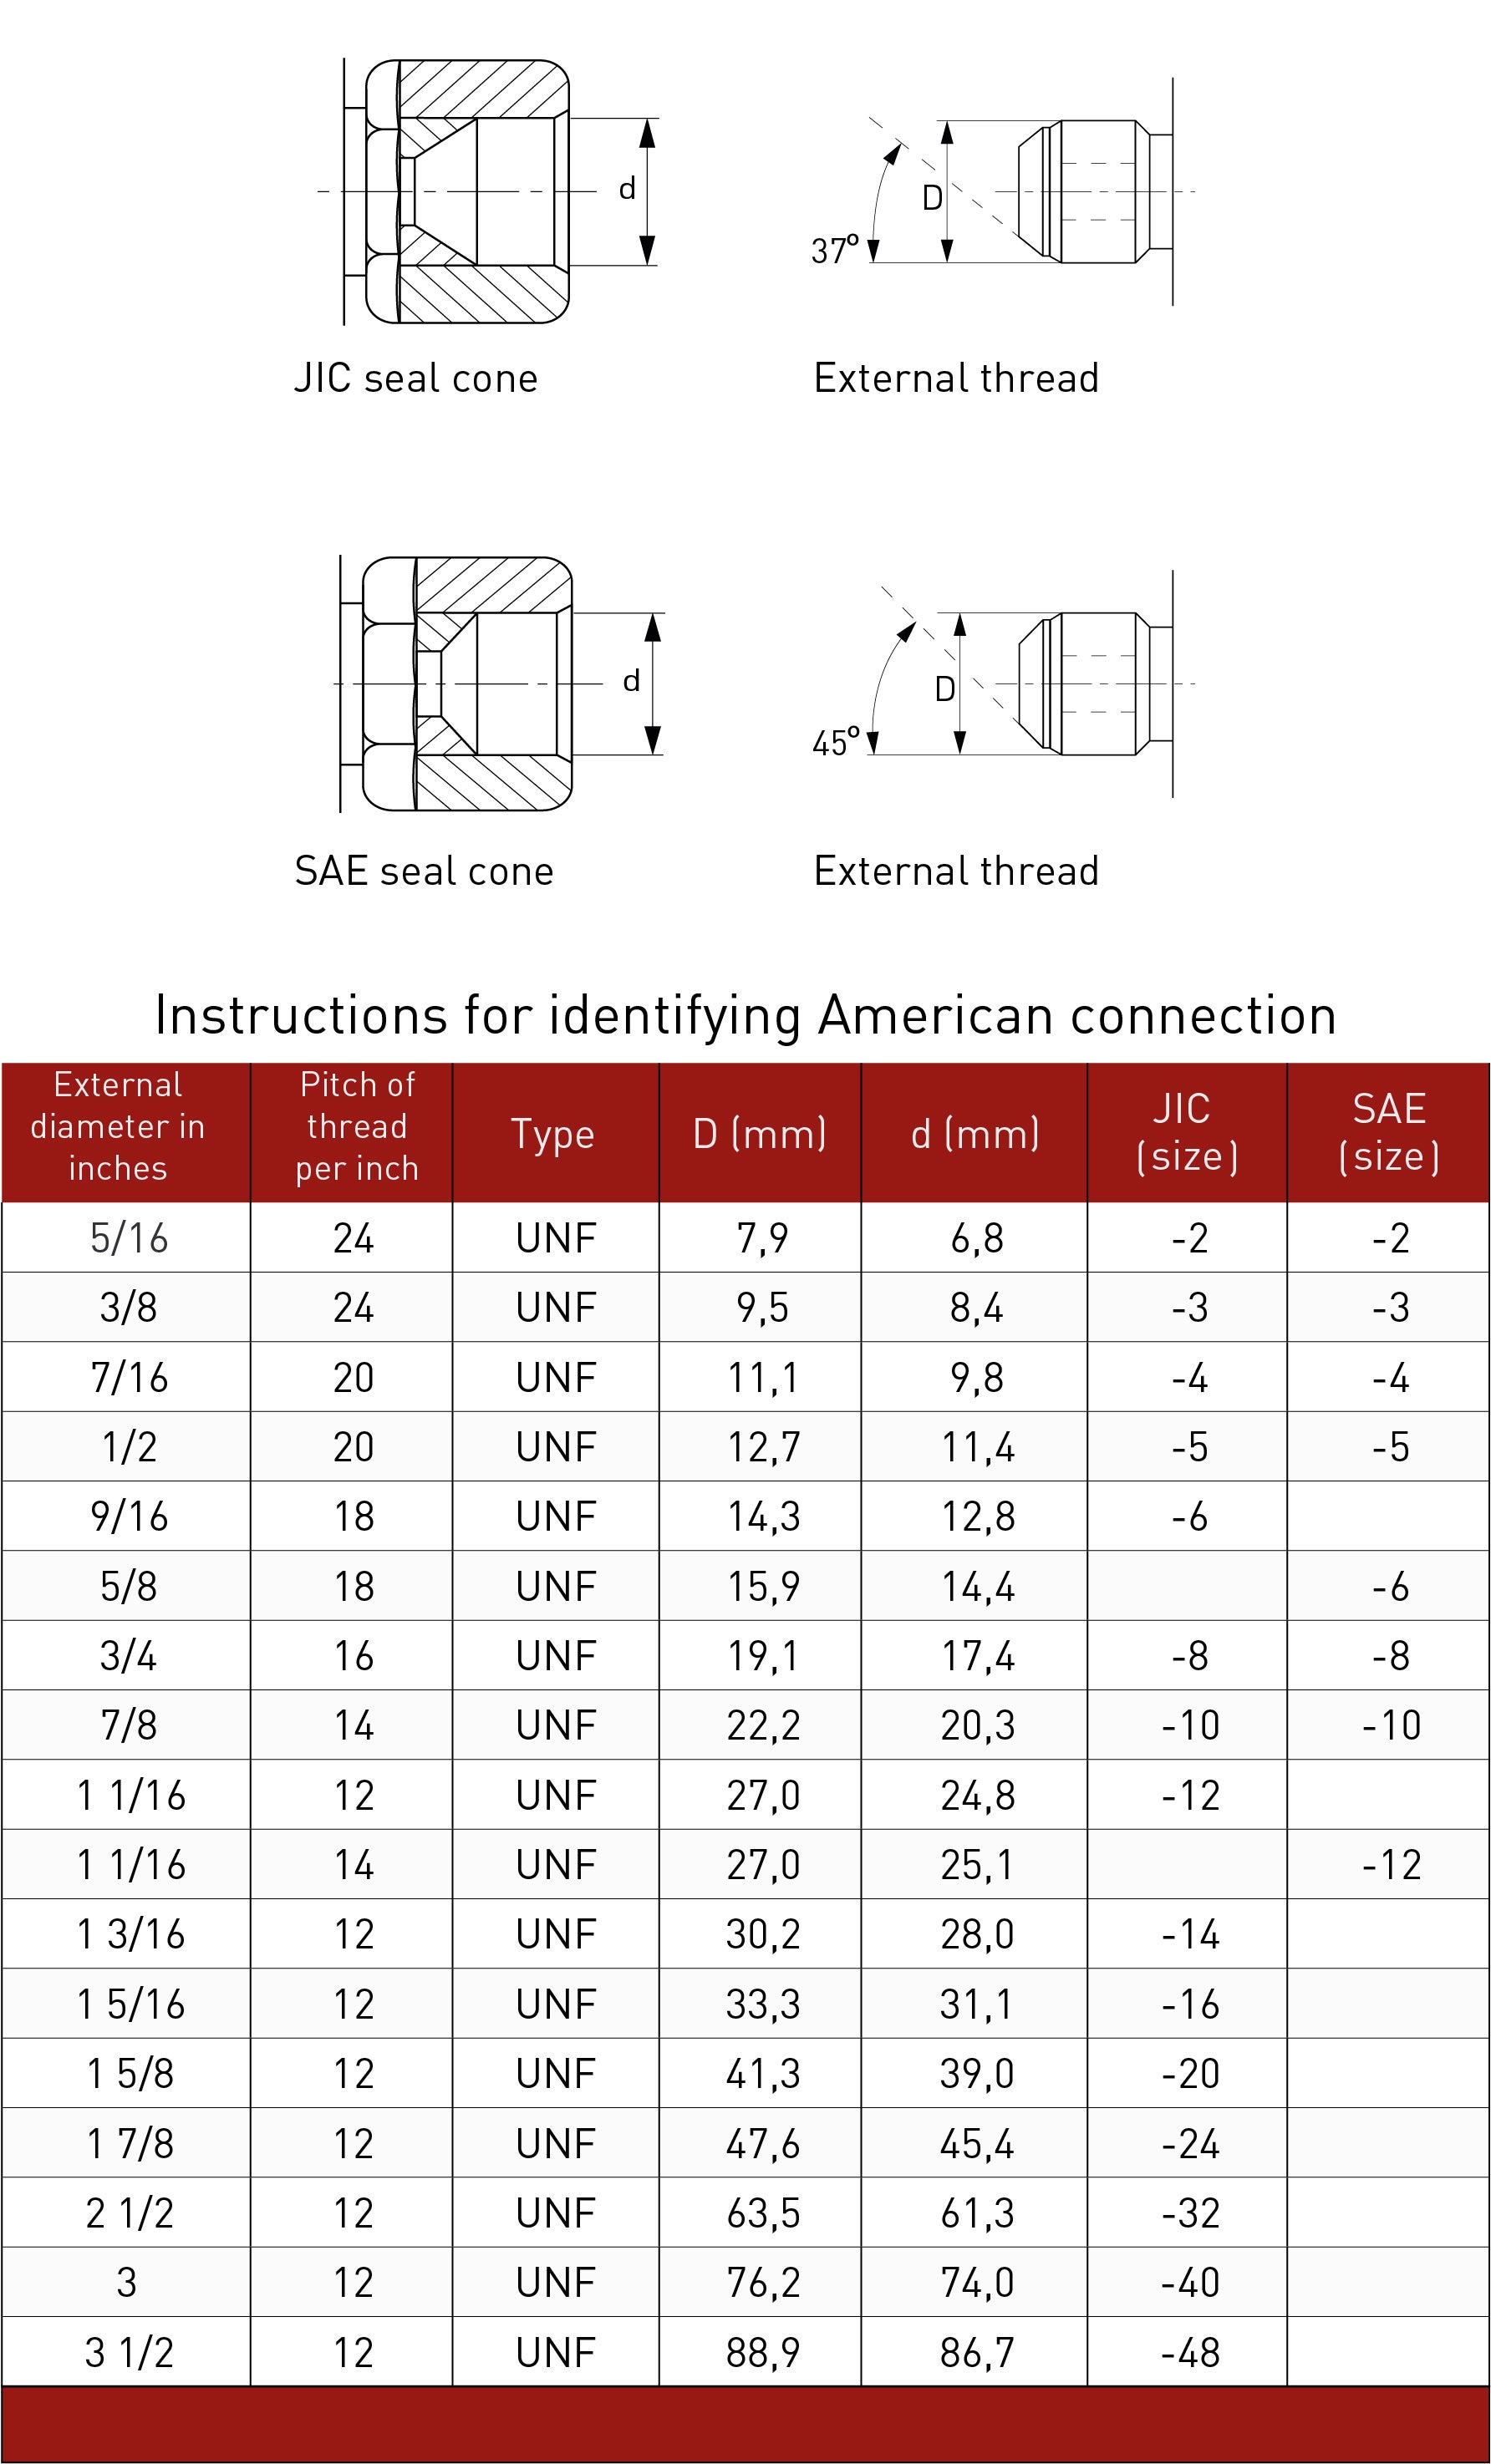
- Joint Industry Council (JIP): PA/C - DKJ-H / AGJ-H;
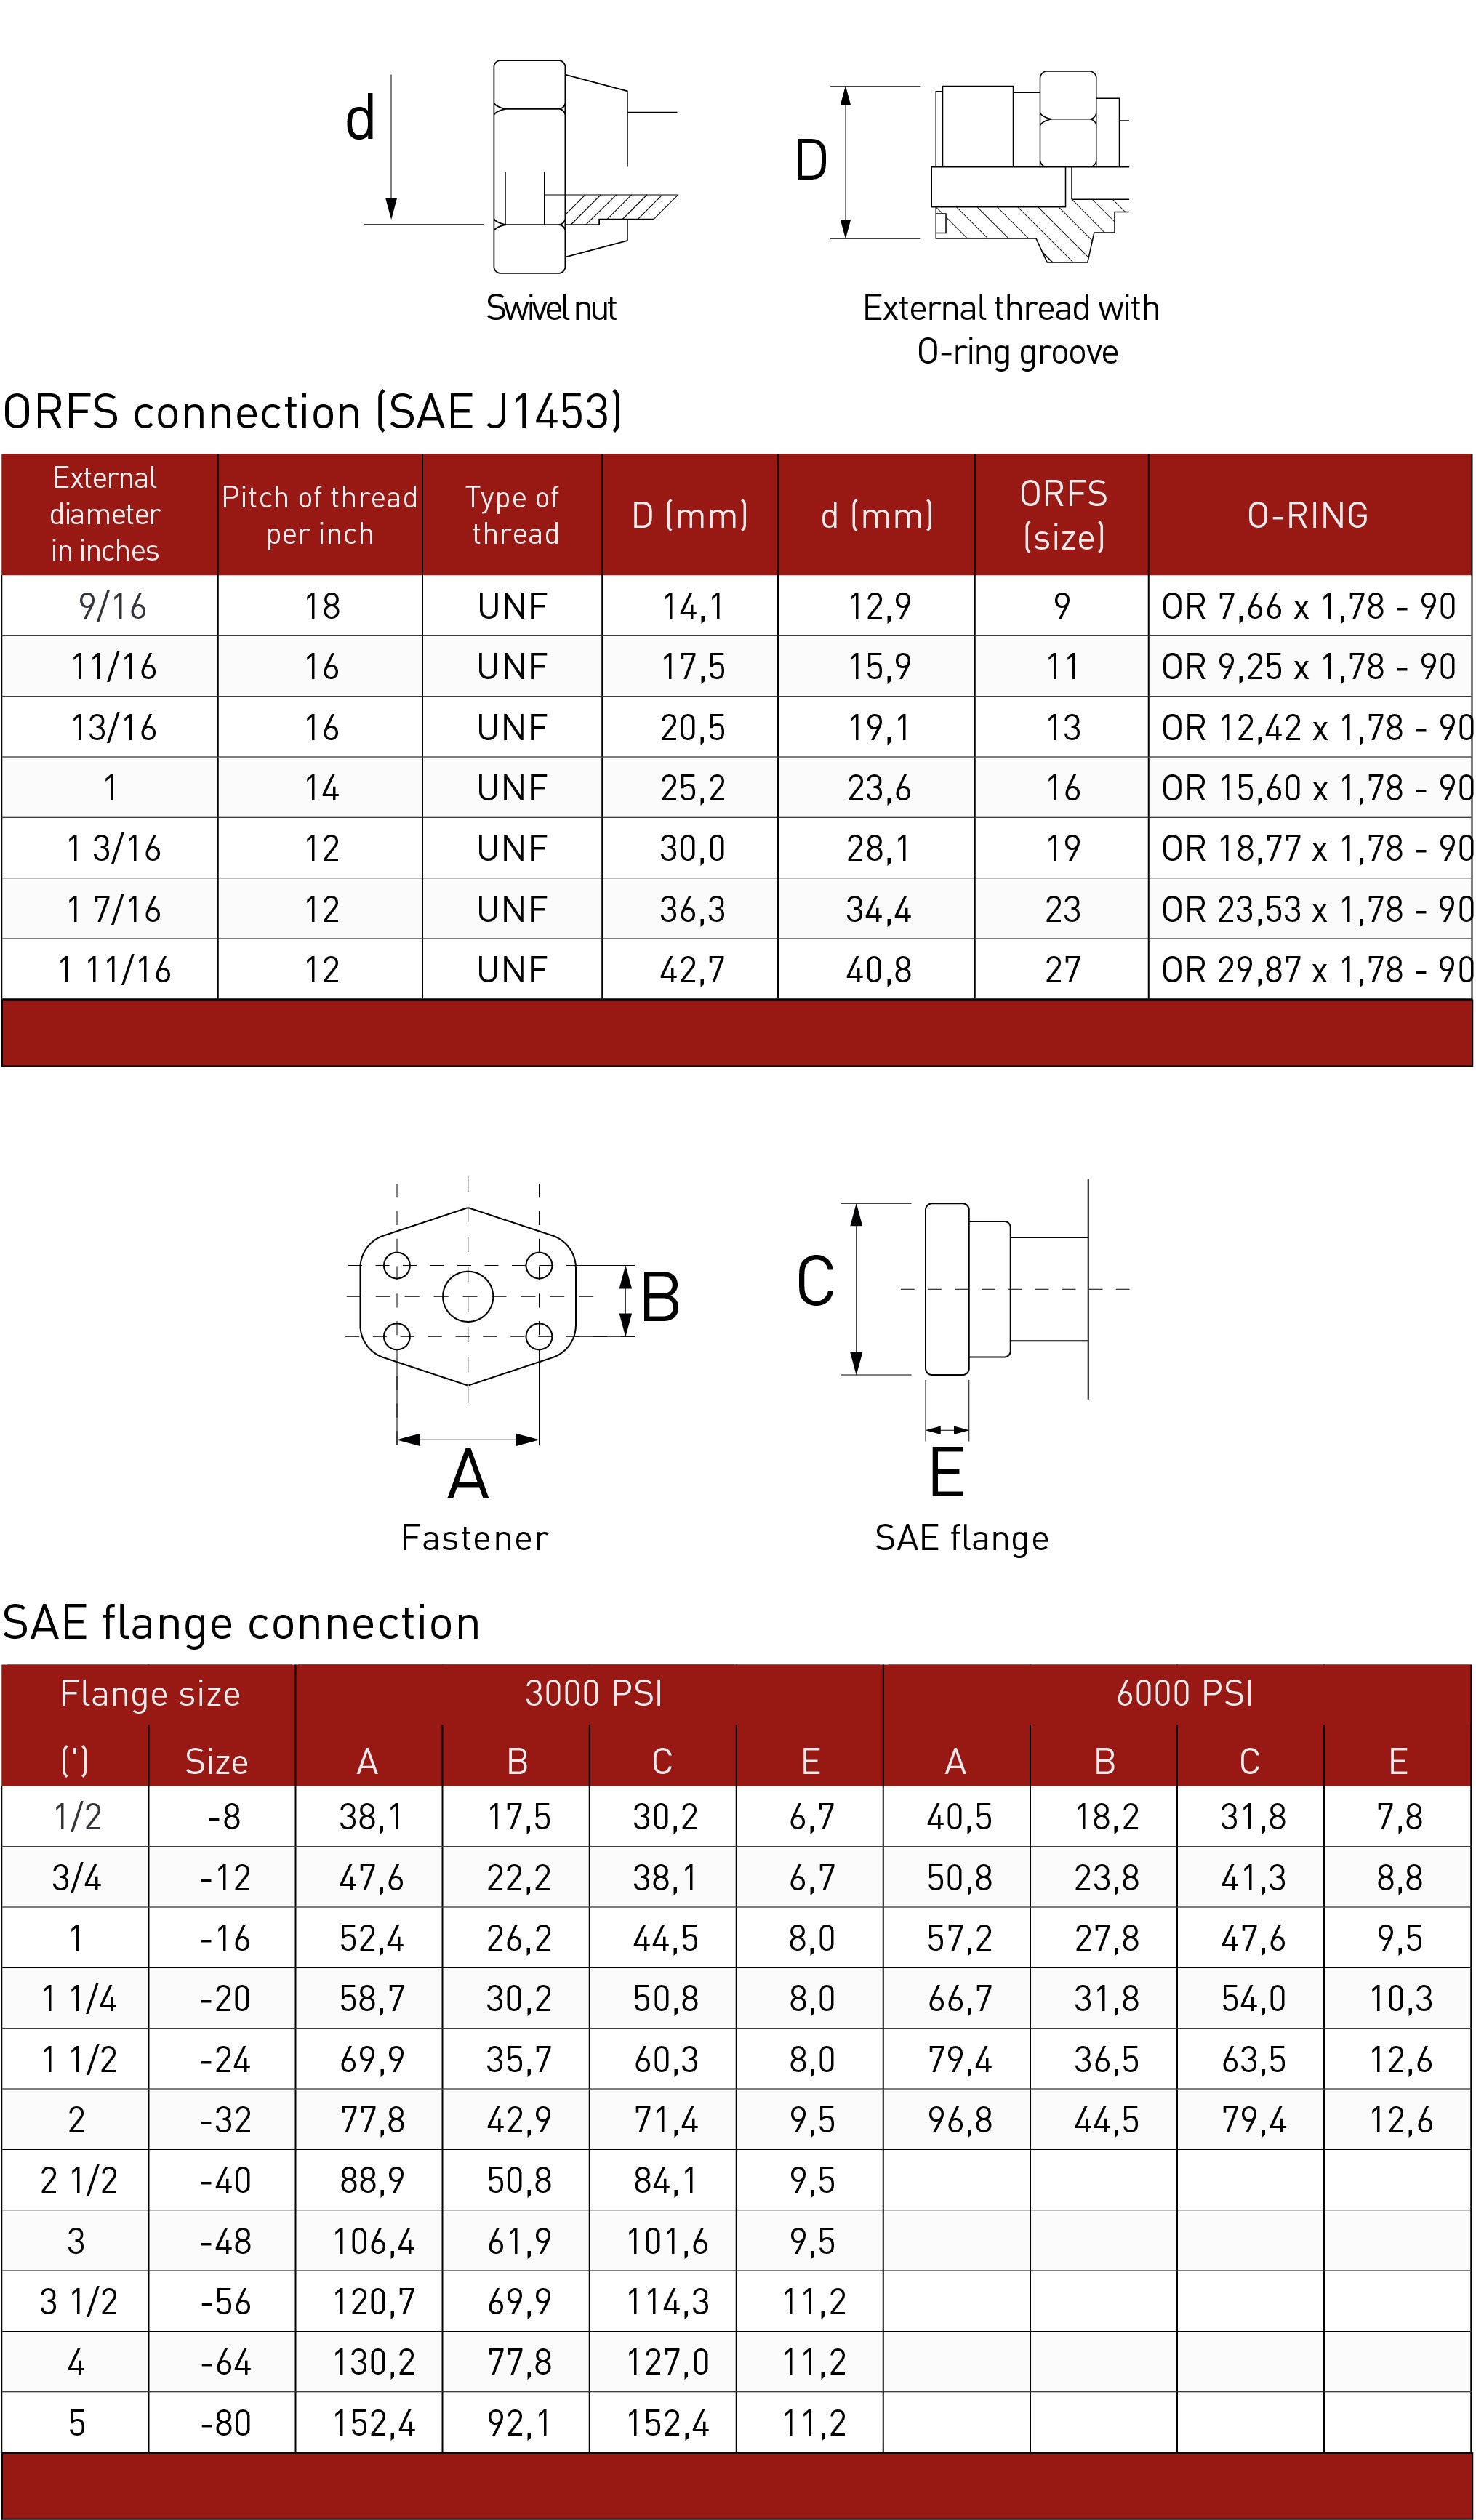
- Flange;
- ORFS.
Follow the step-by-step plan below to easily identify a thread.
Step 1 - Determine whether the thread is conical or straight
In some cases this can be seen with the naked eye, i.e. conical (tapered) threads become smaller towards the end of the fitting. While straight threads retain the same diameter from beginning to end.
If it is not clear by looking at the fitting, use the measuring jaws of a caliper to check if the thread is straight. The presence of O-rings is often an indication that the thread is straight.
Step 2 - Determine the number of passes per inch (threads per inch - TPI) or, for metric threads, determine the pitch (Pitch).
With a thread gauge you can determine the number of threads per inch (TPI) or the pitch (length from one thread to the next). The pitch is indicated in millimeters. Because some distances are similar, it is advisable to try out a number of variants before you decide which one fits best. In the picture below you will find all variants.
Step 3 - Measuring the thread diameter
Use a caliper to determine the diameter. Keep in mind that the measured diameter may deviate from the specified standard dimensions:
1. For tapered thread: measure the 4th or 5th thread run from thread top to thread top.
2. With straight thread: measure on any full thread from thread top to thread top.
Step 4 - Find the suitable thread
Once the thread has been correctly identified, you can easily select a matching screw or nut. Keep in mind that this has to be done as a last resort, you must be sure what you have chosen is correct, to not damage the thread you are trying to Identify. If the thread size is unusual, we can help you determine which standard size will best replace it. In the image below you will find all types and sizes in one overview.
Consult our professionals
By adhering to our simple step-by-step plan, you ensure that machine downtime is kept to a minimum. It also avoids unnecessary costs of purchasing and returning incorrect parts and guarantees a safe working environment. Would you like to know more about this subject? Keep an eye on the Kramp Knowledge Center or contact us at knowledgecenter@kramp.com. We will be happy to help you!